
Previously, I went through the basics of using the Execute Razor Action by putting together a simple Hello World example. (You can find that post here.) Today I’ve decided to show how someone can use the same code and reproduce the same functionality by using a custom Razor token.
Plant An App has several built in core tokens that you can use to produce many different results in the system. Previously, I walked through how to use the DateTime token to output the current date and time in which ever format you want. (That post can be found here). Plant An App allows a Low-Code engineer or developer to create a variety of different types of custom tokens that can be reused in your low-code processes.
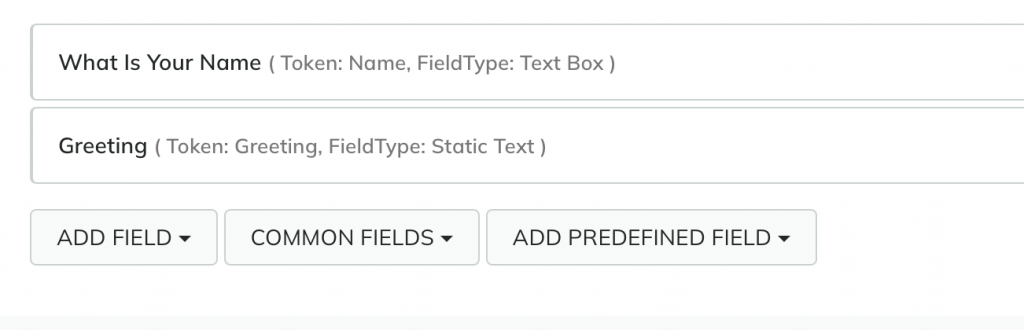
I’m going to start out with the exact same form I used with the Execute Razor Action example. The user will enter their name, or can choose to leave it blank, and then click the run button.

The user input goes into the field/token called Name and the message to the user gets displayed in a static text field named Greeting.
If the visitor entered their name then they will be greeted with the message Hello [Name]! In my example here, I have entered in David so the message reads Hello David!

If the site visitor chooses to not enter a name and instead leaves it blank, then they will receive the generic greeting Hello World!

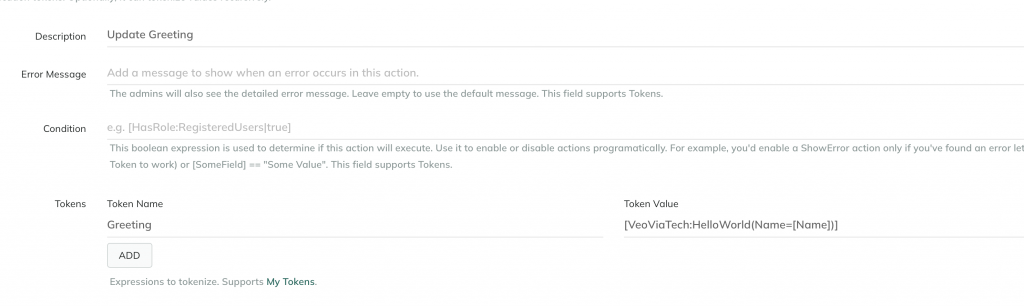
This is a very basic example and like I indicated in the Execute Razor Action post, I could easily accomplish this task with a Create/Update Token Action that had a condition set, but in this case I’m going to use a custom Razor token in C# in order to demonstrate the basic functionality. Behind the Run button are two actions, a Create/Update Tokens action where the custom token will be used and an Update Form Data action that is used to update the greeting field that is displayed to the user.

The Create/Update Token action simply updates the [Greeting] token with the value that comes out of the custom token [VeoViaTech:HelloWorld(Name=[Name])].
The Update Form Data action is what handles updating the form without doing a full screen refresh, so that the site visitor gets the greeting message displayed to them.
All the magic is in the custom VeoViaTech:HelloWorld token so let me break it down in more detail. The name of the token is HelloWorld and it exists in the namespace VeoViaTech. It takes one parameter Name and I am passing the token [Name] in as the parameter value. [Name] is the value coming from the input field Name on the form. That’s all that needs to be done to use the custom token and it handles all the work of deciding what to output into the Greeting field.
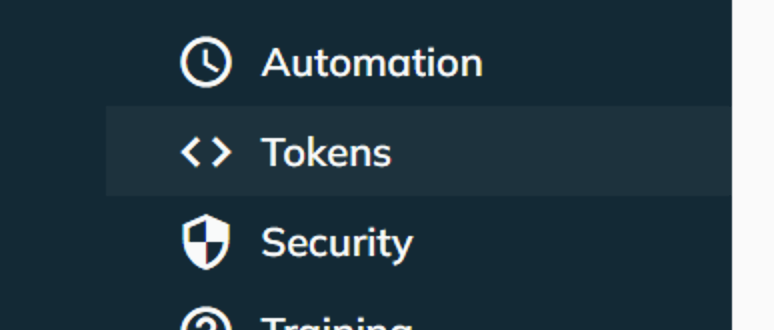
Tokens can be accessed from the Tokens menu of Plant An App.
You’ll want to create your own custom token namespace to keep things organized, and in my case I have created a VeoViaTech namespace to hold my custom tokens.
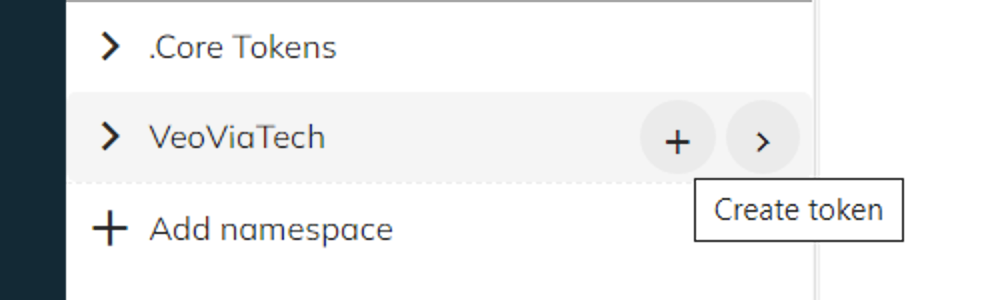
Once the namespace is created, a new token can be added by clicking the + next to the namespace where it will live at which point the Add/Edit form is presented where the name of the custom token can be provided.

Clicking into the definition section provides the ability to select from several different types of custom tokens that can be chosen, but for this example I will be selecting the Razor Script Option.
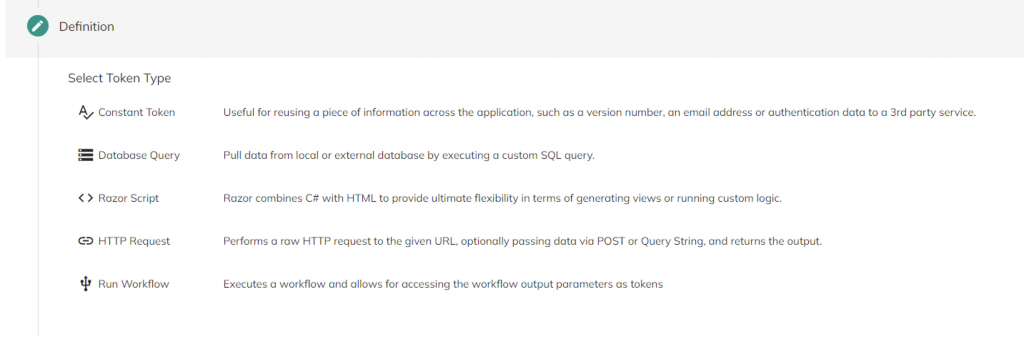
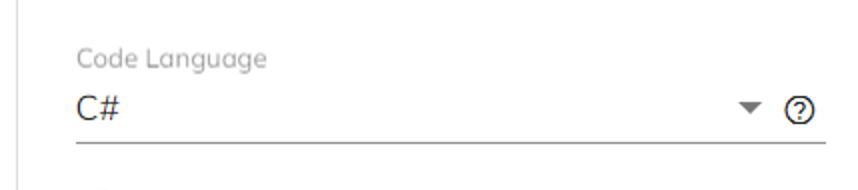
Razor Script tokens allow the creator to use either C# or VB.NET as the definition for the token. In this example I will be using C#, but if you are more comfortable with VB.NET then don’t worry, you will have all the same abilities and functionality available no matter which .NET language you chose to use.
There are a few other sections available but I’m going to focus on the definition as that is the most important. All the logic for what will happen with the custom token goes into the Script section here, and as shown below it is almost identical to the code used in the Execute Razor Action example.
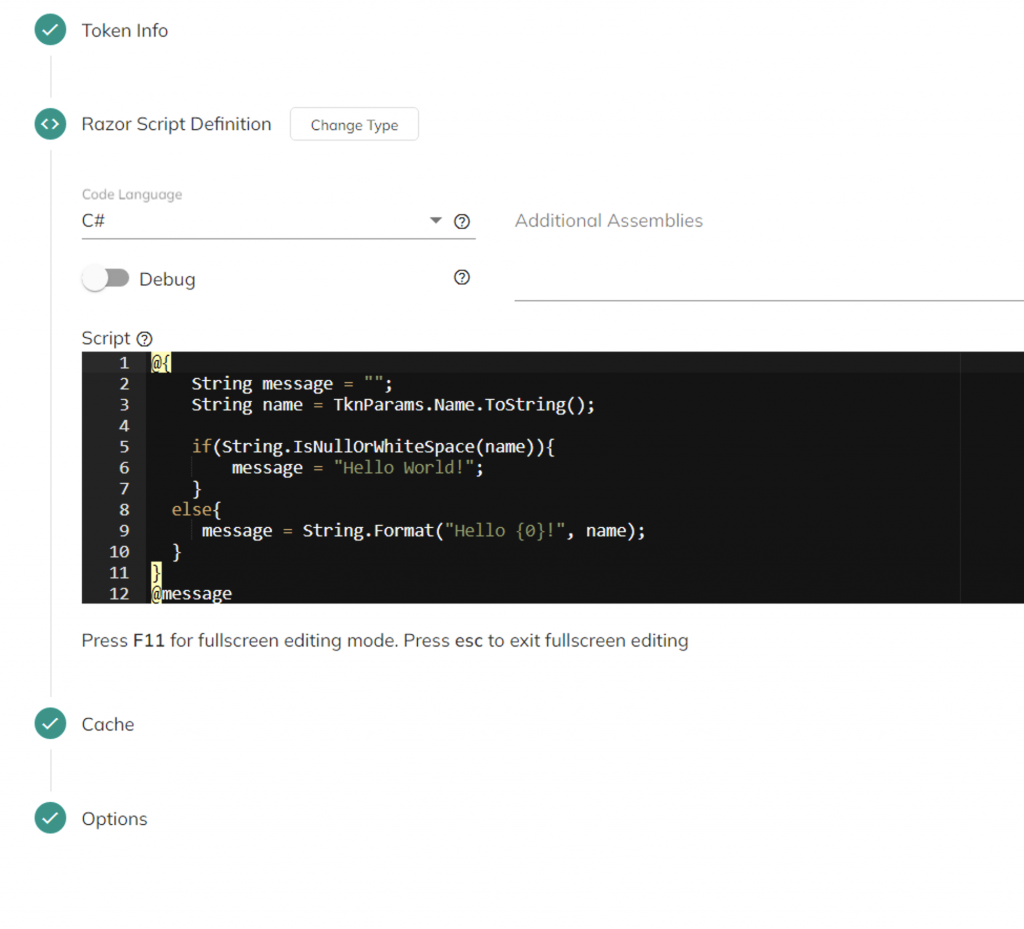
The big difference when creating it as a token is the syntax for accessing the Name parameter that is passed into the token via [VeoViaTech:HelloWorld(Name=[Name])].
String name = TknParams.Name.ToString();Don’t confuse the token [Name] that comes from the form field with the Name= parameter defined on the custom token. The input name parameter is accessed in the C# code off of the TknParams object and needs to be casted to a string using the appropriately named ToString() method. After that point, everything is the same.
if(String.IsNullOrWhiteSpace(name)){
    message = "Hello World!";
 }
 else{
    message = String.Format("Hello {0}!", name);
 }
The name variable is checked to see if it is blank. If it is, then message is set to “Hello World!” Otherwise, if the user provides a name, i.e. the name variable is populated, then message is set to “Hello David!” or whatever name the visitor has entered.
Finally, the contents of the message are outputted using @message, which takes the final result that is stored in the variable message and uses it for the token value.
@messageThat’s all there is to it! Either way you choose to utilize Razor code in Plant An App, whether it be using a custom token like I have shown here, or with the Execute Razor Action that I posted about previously, you’ll be writing almost the exact same code and be able to produce the same result. Hopefully your mind is now racing with all sorts of ideas on how you can use a custom Razor token in your Plant An App sites to enhance the experience for your users.
Like I have said before, I only know what I know, and don’t know what I don’t know, so if you have something to add to the conversation feel free to reach out via email or in the comments below. Let me know if you’d like me to dive deeper into more functionality of custom tokens, Plant An App topics in general, or other things related to software development and technology.
Need help with a software solution for you business? Contact Us
Comments are closed